Remember the taste of tomatoes from your grandmother’s backyard? That burst of sweetness, that smell of sunshine captured in red skin? That’s what we’ve lost somewhere between the farm and our Instagram-filtered brunches. But here’s the good news: you can get it back.
A 2023 FICCI report revealed that over 33% of urban Indian families have started kitchen gardening at home. This isn’t just another wellness trend that’ll fade by next monsoon. It’s a quiet revolution happening on balconies, terraces, and windowsills across the country. People are rediscovering something our grandparents knew instinctively: that the best food comes from soil you trust, grown by hands you know. Yours.
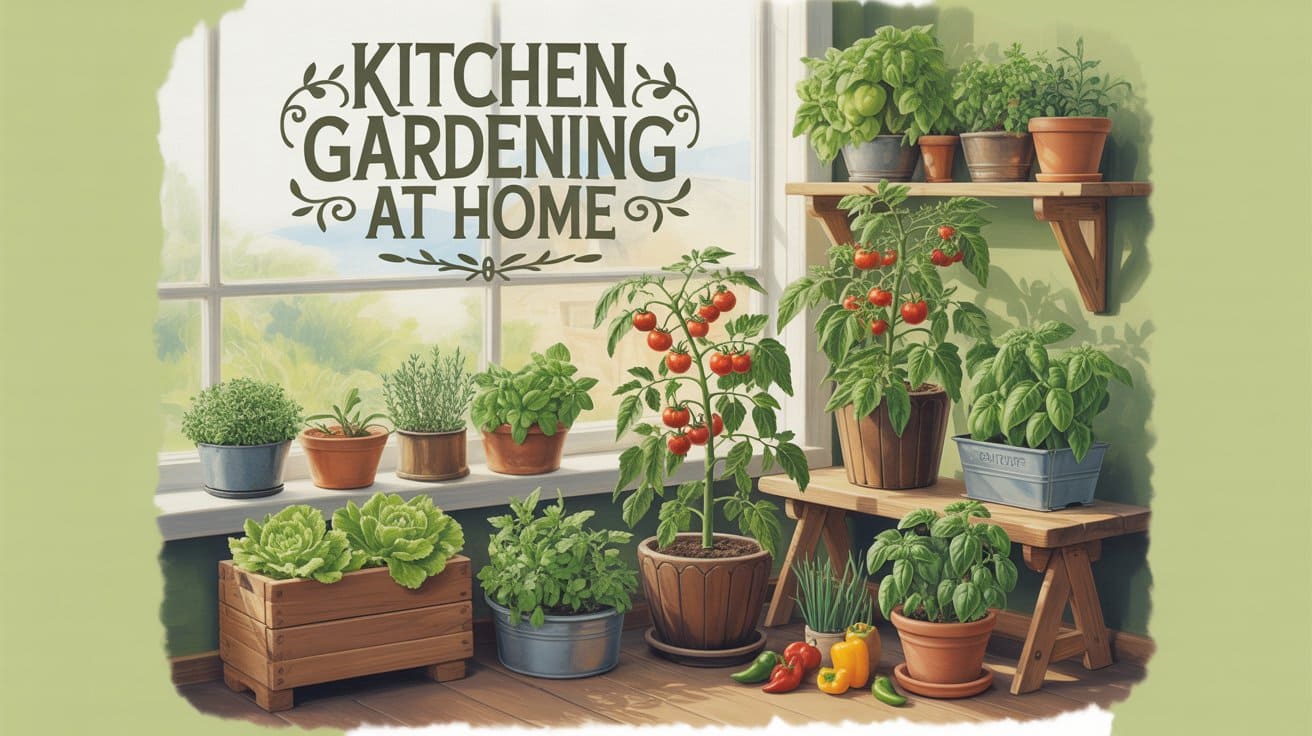
Whether you’re a Mumbai professional with just a 3×4 balcony or a Bangalore homeowner with a sunny terrace, this guide will walk you through creating your own home kitchen garden. Not the Pinterest-perfect version with matching terracotta pots, but the real, slightly messy, incredibly rewarding kind that actually feeds you.
What Exactly is Kitchen Gardening at Home?
Let’s cut through the jargon. Kitchen gardening at home simply means growing edible plants—vegetables, herbs, fruits somewhere near your kitchen. It could be five pots on your windowsill or a full-fledged vegetable garden at home sprawling across your terrace.
Unlike traditional farming or those massive community gardens, your home kitchen garden is personal, manageable, and designed around one simple question: “What do I actually eat?”
Think of it as relocating a tiny section of the sabzi mandi to your doorstep. That’s it. No mysticism, no expensive equipment needed to start. Just you, some soil, seeds, and curiosity.
Why Start a Kitchen Garden at Home? (Beyond the Instagram Aesthetic)
1. You’ll Actually Know What You’re Eating
When I harvested my first batch of spinach from my balcony garden, my six-year-old asked, “Mumma, why doesn’t it have the white powder?” She meant pesticide residue. That question changed how I thought about food forever.
A vegetable garden at home gives you complete control. No hidden chemicals, no wax coatings, no artificial ripening agents. The National Horticulture Board reports that home-grown vegetables can contain up to 40% more nutrients compared to store-bought produce that’s been sitting in cold storage for weeks.
2. The Math Actually Makes Sense
Let me break down the real economics of kitchen gardening at home something most articles avoid:
Initial Investment (100 sq ft space):
- Containers/Grow bags: ₹1,200-2,000
- Soil mix: ₹500-800
- Seeds: ₹300-500
- Tools: ₹400-600 Total: ₹2,400-3,900
Returns per season (3 months): According to National Horticulture Board data, a well-maintained 100 sq ft kitchen garden at home can yield vegetables worth ₹2,500-4,000 per season.
Here’s what gets interesting: By the second season, you’re already in profit because your containers and tools are reusable. By year’s end, you’ve typically saved ₹8,000-12,000 on groceries. And that’s not counting the herbs, which cost ₹20-30 per bunch at stores but grow perpetually in your home kitchen garden.
High-ROI crops for Indian kitchens:
- Coriander: Regrows every 25 days, saves ₹400-600/year
- Curry leaves: One plant = infinite supply, saves ₹800-1,200/year
- Tomatoes: 3-4 plants produce 8-10 kg/season, saving ₹600-800
- Chillies: Continuous harvest for 8-10 months, saves ₹500-700
- Mint: Grows like a weed, saves ₹300-500/year
3. Mental Health Isn’t Just a Buzzword Here
I won’t feed you romanticised nonsense about “connecting with Mother Earth.” But I will tell you this: there’s something deeply satisfying about watching a seed crack open because you watered it correctly.
Research from the Journal of Health Psychology shows that gardening reduces cortisol levels by up to 28%. It’s not magic it’s just that your brain gets a break from screens, deadlines, and notifications. Your kitchen garden at home becomes a meditation you can eat.
4. Environmental Impact (The Numbers They Don’t Tell You)
Every kilogram of vegetables transported from farm to your plate generates approximately 0.9 kg of CO2 emissions. Your home kitchen garden? Zero food miles.
Plus, if you’re composting kitchen waste (we’ll get to that), you’re diverting about 2-3 kg of waste per week from landfills. That’s 100-150 kg annually that isn’t producing methane in some garbage mountain.
Setting Up Your Space: Working with What You Actually Have
Forget the glossy magazine gardens. Let’s talk about real Indian homes.
For the 8×4 Balcony Warriors (Mumbai/Metro Apartments)
Your challenge: Limited space, weight restrictions (most balconies safely support 300-400 kg/sq m)
Your advantage: Protected from extreme weather, easier to water
Set up strategy:
- Vertical wall-mounted planters (use 3D space)
- Railing planters for herbs
- Stackable grow bags (3-tier systems)
- Hanging baskets for cherry tomatoes or strawberries
Best crops for kitchen gardening at home in small balconies:
- Herbs: Coriander, mint, basil, curry leaves (these are non-negotiable!)
- Leafy greens: Spinach, fenugreek, amaranth
- Compact vegetables: Chillies, lettuce, radish
- Microgreens: For that 7-day harvest thrill
Pro tip for Jamshedpur/Jharkhand gardeners: Your summer temperatures hit 40-42°C. Install a 50% shade net on west-facing balconies between April and June. Your plants will thank you.
For the Terrace/Rooftop Owners (The Lucky Ones)
Your challenge: Extreme sun exposure, wind, and waterproofing concerns
Your advantage: Space, sunlight, can accommodate larger setups
Critical first step: Waterproofing check! Before creating your vegetable garden at home on the terrace, ensure drainage is functional. A flooded terrace during the monsoon will destroy both your garden and your home.
Set up strategy:
- Raised beds (use bricks/cement blocks + wood)
- Large grow bags (30-40 litres for tomatoes, brinjal)
- Composting corner (you have the space!)
- Tool storage box
Weight distribution: Don’t place all heavy containers along walls. Distribute the load evenly. Each 20-litre container with soil weighs approximately 25-30 kg.
For the Windowsill Herb Gardeners (North-Facing Challenges)
Your reality: Limited sunlight (2-3 hours), small space
Your superpower: Convenience, year-round growing
Best herbs for low light in your home kitchen garden:
- Mint (thrives with 3-4 hours of sun)
- Coriander (tolerates partial shade)
- Parsley
- Chives
Use reflective surfaces (aluminium foil on cardboard) behind pots to maximise light.
For the Backyard Dreamers (Yes, Some Still Exist!)
If you have ground space, you’re playing on easy mode. Create permanent raised beds (4×8 ft is ideal), dedicate one corner to composting, and another to a tool shed.
Monsoon drainage tip for Jharkhand gardens: Your region receives 1,100-1,400mm annual rainfall. Create shallow trenches (6 inches deep) around garden beds to prevent waterlogging during heavy monsoon showers.
The Foundation: Soil Mix That Actually Works
Here’s where most guides get vague. They’ll say “use good soil” and move on. Let me give you the exact recipe I use in my vegetable garden at home:
The Standard Mix (For most vegetables)
- 40% garden soil/red soil
- 30% compost (more on making this free below)
- 20% cocopeat (water retention + aeration)
- 10% vermicompost (nutrient boost)
- 1 handful of neem cake powder per 10L mix (pest prevention)
The Herb Mix (For coriander, basil, and mint in your kitchen garden at home)
- 50% cocopeat
- 30% compost
- 20% garden soil
- Pinch of sand for extra drainage
The Fruiting Vegetable Mix (Tomatoes, brinjal, chillies)
- 35% garden soil
- 35% compost
- 20% cocopeat
- 10% vermicomast
- 2 handfuls bone meal per 20L mix (phosphorus for flowers/fruits)
Where to source these in India:
- Garden soil: Local nurseries (₹10-15 per kg)
- Cocopeat: 5kg block = ₹200-250 (expands to 75L when soaked!)
- Vermicompost: ₹20-30 per kg
- Neem cake: ₹40-60 per kg
The drainage is non-negotiable: Every container needs holes at the bottom. Add a 1-inch layer of broken terracotta pieces or gravel before filling the soil. Root rot is the #1 killer in urban home kitchen gardens.
Container Selection: Beyond Pretty Pots
Grow Bags (My Personal Favourite)
Pros: Excellent drainage, breathable, lightweight, cheap (₹30-150 depending on size)
Cons: Not pretty, 2-3 year lifespan
Best for: Tomatoes, spinach, beans in your kitchen gardening at home setup
Terracotta/Clay Pots
Pros: Breathable, regulates temperature, looks traditional
Cons: Heavy, breaks easily, expensive (₹100-500)
Best for: Herbs, ornamental edibles, and permanent plants like curry leaves
Plastic Pots
Pros: Durable, lightweight, affordable (₹20-100)
Cons: Can overheat in summer, not breathable
Best for: Beginners, monsoon crops
DIY Containers for Creative Kitchen Gardens at Home
- Old paint buckets (drill 4-5 holes at the bottom)
- Wooden crates lined with plastic
- Plastic storage boxes
- Even old pressure cookers! (I’ve seen this work!)
Size matters:
- Herbs: 6-8 inch depth
- Leafy greens: 8-10 inch depth
- Root vegetables (carrot, radish): 12-inch depth minimum
- Tomatoes/brinjal: 12-15 inch depth, 20-30L capacity
The Starter Plants: What to Grow in Your First Kitchen Garden at Home
Let’s be honest—if your first batch dies, you’ll probably give up. So start with the immortals.
The “You-Cannot-Kill-These” Tier
1. Coriander (Dhaniya)
- Germination: 7-10 days
- Harvest: 25-30 days
- Indian must-have for every home kitchen garden
- Crush seeds before sowing for better germination
- Continuous sowing every 15 days for an uninterrupted supply
2. Mint (Pudina)
- Grows from cuttings! Just stick a stem in the soil
- Harvest: Ongoing (starts in 20 days)
- WARNING: Grows aggressively. Use a separate container!
- One plant feeds a family of four
3. Spinach (Palak)
- Germination: 5-7 days
- Harvest: 30-40 days, cut-and-come-again method
- Thrives in partial shade
- Perfect for winter kitchen gardens at home
4. Fenugreek (Methi)
- Germination: 3-5 days (fastest!)
- Harvest: 25-30 days
- Grows well in cooler months
- Bonus: Seeds are edible (methi dana)
5. Curry Leaves
- Buy a small plant (₹50-100)
- Harvest: 3-4 months for established growth
- One-time investment, lifetime supply
- Essential for South Indian home kitchen gardens
The Beginner-Friendly Vegetables
6. Tomatoes
- Best varieties for Indian vegetable gardens at home: Pusa Ruby, Desi varieties
- Staking required (use bamboo sticks)
- Harvest: 60-80 days
- One plant = 2-3 kg yield
7. Chillies
- Varieties: Bhut Jolokia (if you dare), regular green chillies
- Harvest: 70-90 days, then continuous for 8-10 months
- Needs full sun (6+ hours)
- One plant feeds a family
8. Brinjal/Eggplant
- Compact varieties: Nagpur Local, Hybrid F1
- Harvest: 60-70 days
- Support is required when fruiting
9. Bottle Gourd (Lauki)
- Needs trellis/support
- Harvest: 60-70 days
- One vine produces 6-8 gourds
- Summer champion for kitchen gardening at home
10. Radish
- Germination: 3-5 days
- Harvest: 25-30 days
- Great for kids (fast results!)
- Winter crop
The Herb Powerhouses Beyond Basics
11. Holy Basil (Tulsi)
- Medicinal + culinary
- Grows year-round
- Spiritual significance bonus
- Mosquito repellent!
12. Lemongrass
- One clump multiplies into dozens
- Tea, curries, and natural mosquito repellent
- Drought-tolerant
13. Oregano & Thyme
- For the pizza/pasta lovers
- Dries well for year-round use
- Grows in small pots
Climate-Specific Guide: Because “6 Hours Sunlight” Doesn’t Work Everywhere
This is where most guides fail. India isn’t one climate—it’s twelve.
Hot & Humid (Jamshedpur, Jharkhand – My Areas Climate)
Summer challenges (April-June):
- Temperatures: 38-42°C
- Challenge: Heat stress, rapid soil drying
- Solution strategies for your vegetable garden at home:
- 50-70% shade cloth during peak afternoon (12 PM-4 PM)
- Mulch with dried leaves/coconut husk (retains moisture, cools soil by 3-5°C)
- Water twice daily: early morning (6-7 AM) + evening (6-7 PM)
- Choose heat-tolerant varieties: Amaranth, bottle gourd, okra, snake gourd
Monsoon magic (July-September):
- Rainfall: 300-400mm monthly
- Challenge: Fungal diseases, overwatering
- Solutions for kitchen gardens at home:
- Ensure excellent drainage (critical!)
- Reduce watering frequency (let rain do the work)
- Spray neem oil weekly (fungal prevention)
- Best crops: Spinach, coriander, beans, gourds (they love monsoon)
Winter paradise (November-February):
- Temperatures: 10-25°C (perfect for most vegetables!)
- This is YOUR prime season for kitchen gardening at home
- Grow: Tomatoes, brinjal, cauliflower, cabbage, carrot, beetroot, peas
Pro tip for Jharkhand gardeners: Start winter crops by mid-October. Your first frost (if any) arrives by late December, giving you 70-80 days of ideal growing conditions.
Tropical Year-Round (Bangalore, Kerala, Coastal Areas)
Your advantage: No extreme winters
Your challenge: Consistent humidity = fungal issues
- Use terracotta pots (breathability prevents fungus)
- Space plants for air circulation
- Neem spray every 10 days (prevention > cure)
- Grow: All leafy greens year-round, beans, and cucumbers
Desert Heat (Rajasthan, Parts of Gujarat)
Your reality: 45°C+ summers, dry heat
- Shade cloth non-negotiable (60-70%)
- Drip irrigation or ollas (buried clay pots for slow water release)
- Mulch thickness: 3-4 inches minimum
- Focus on native/heat-adapted varieties
- Morning glory for shade + edible leaves
Cold Winters (Delhi, North India)
Challenge: Winter drops to 4-8°C
- Protect with plastic sheets on cold nights
- Winter = peak season! Grow all cruciferous vegetables
- Stop watering tomatoes/chillies after October (they pause growth)
- Hot pepper varieties handle cold better
The Watering Wisdom They Don’t Teach
“Water when the soil is dry” is useless advice. Here’s the real system:
The Finger Test (Works 100% of the Time)
Stick your index finger 2 inches into the soil:
- If it comes out with soil sticking = don’t water
- If it comes out clean/dry = water time
- If water pools on the surface after watering = drainage problem!
Time-of-Day Rules for Home Kitchen Gardens
Summer in hot climates:
- Morning: 6-7 AM (primary watering)
- Evening: 6-7 PM (secondary, lighter watering)
- NEVER at noon (50-60% water loss to evaporation)
Winter:
- Morning: 8-10 AM (only)
- Evening watering causes fungal issues in cold weather
Monsoon:
- Check the soil first. Probably doesn’t need water
- Water only if the top 3 inches are dry
The Lazy Gardener’s Watering Hacks
1. Drip Irrigation on Budget Poke 3-4 small holes in the plastic bottle cap. Fill the bottle, place it upside down in the soil. Water releases slowly over 24 hours. Perfect for kitchen gardening at home when you travel.
2. Self-Watering Containers
- Take two plastic pots
- Smaller pot (with holes) sits inside larger pot (without holes)
- Fill the gap with water
- Soil wicks up water as needed
3. Moisture-Retaining Additions
- Mix hydrogel crystals in soil (1 teaspoon per 5L soil)
- They absorb 400x their weight in water
- Reduces watering frequency by 50%
4. Ollas (Traditional Clay Pot Method)
- Bury an unglazed clay pot with just the neck exposed
- Fill with water
- Seeps slowly into the surrounding soil
- Ancient technique, perfect for your vegetable garden at home
Organic Pest Control: Actual Recipes That Work
Chemical pesticides don’t belong in kitchen gardens at home. Period. Here are recipes I’ve used successfully for 4 years:
Neem Oil Spray (The Universal Soldier)
Recipe:
- 5ml cold-pressed neem oil
- 2ml liquid soap/dishwashing liquid (emulsifier)
- 1 litre of water
Method: Mix the soap in water first, then add neem oil. Shake vigorously. Spray on ALL plant surfaces including undersides of leaves.
Uses: Aphids, whiteflies, mealybugs, fungal diseases
Frequency: Every 7-10 days as prevention, every 3 days for active infestation
Application: Evening only (sun + neem oil = leaf burn)
Garlic-Chilli Weapon (For Serious Infestations)
Recipe:
- 10-12 garlic cloves
- 4-5 green chillies
- 1 tablespoon vegetable oil
- 1 litre of water
- A few drops of liquid soap
Method: Grind garlic and chillies to a paste. Boil in water for 10 minutes. Cool, strain, and add soap. Store in a glass bottle for up to 1 week.
Uses: Aphids, caterpillars, ants
Frequency: Every 3-4 days during infestation
Buttermilk Fungicide (Monsoon Essential)
Recipe:
- 1 cup buttermilk/plain curd
- 4 cups water
Method: Mix and spray on leaves
Uses: Powdery mildew, fungal issues common in humid home kitchen gardens
Frequency: Once a week during the monsoon
Soap Spray (Gentlest Option)
Recipe:
- 1 tablespoon liquid soap
- 1 litre of water
Uses: Soft-bodied insects, aphids
Wash off after 2-3 hours
Companion Planting: Your Natural Pest Squad
Plant these together in your vegetable garden at home:
- Marigolds near tomatoes → repel nematodes + whiteflies
- Basil near tomatoes → improves flavour + repels mosquitoes
- Mint borders → repel ants (but contains it!)
- Coriander + fennel → attract beneficial insects
- Curry leaves near vegetables → natural pest deterrent
The Manual Removal Method (Weirdly Satisfying)
For caterpillars, snails: Pick by hand in the early morning when they’re slow. Drop in soapy water. I know it sounds gross, but it’s effective, and you’ll feel like a garden warrior.
Composting: Turn Your Kitchen Waste Into Black Gold
Every day, your kitchen produces potential plant food. Here’s how to capture it:
The Balcony Composter (For Apartments)
Bokashi method (fermentation, no smell!)
What you need:
- 2 buckets with lids (20L each)
- Bokashi bran (buy online, ₹200 for 1kg = 3 months supply)
- Tap/hole at the bottom for liquid drainage
Process:
- Add kitchen waste daily
- Sprinkle bokashi bran (2 tablespoons)
- Press down to remove air
- Close the lid tightly
- Drain liquid every 2-3 days (dilute 1:100 with water = liquid fertiliser)
- After 2 weeks, the waste looks pickled (it’s fermented)
- Bury in soil or mix with cocopeat, wait 2 weeks = finished compost
Advantages: No smell, works in small spaces, fast process for your home kitchen garden
The Traditional Pile (For Terrace/Backyard)
Three-bin system:
- Bin 1: Fresh waste (current month)
- Bin 2: Decomposing (last month)
- Bin 3: Finished compost (2 months old)
Layering formula:
- 1 part green waste (veggie peels, fruit scraps, plant clippings)
- 1 part brown waste (dried leaves, paper, cardboard)
- Handful of soil (introduces microbes)
- Water to dampen (not drench)
Turn weekly with a stick. After 45-60 days = rich compost for your kitchen garden at home.
What DEFINITELY Goes In:
- Vegetable peels
- Fruit scraps (not citrus in bulk)
- Coffee grounds + filters
- Tea bags (remove staples)
- Crushed eggshells (calcium!)
- Dried leaves
- Shredded newspaper
- Paper towels
- Hair (yes, really! Nitrogen-rich)
What STAYS OUT:
- Meat, fish, bones
- Dairy products
- Oily/greasy food
- Diseased plants
- Weeds with seeds
- Pet waste
- Plastic (obviously)
Troubleshooting Compost Issues
Smells bad: Too wet + not enough air. Add dried leaves, turn more frequently. Too dry/not decomposing: Add water, add more green waste. Flies/insects: Bury fresh waste under brown material, add dried leaves on top. Takes too long: Chop waste into smaller pieces, add more green waste, turn more often.
Here’s a more detailed guide on how to make kitchen waste compost
Fertilisation: Feeding Your Kitchen Garden at Home
Compost alone isn’t always enough. Here are organic boost options:
Homemade Liquid Fertilisers
Banana Peel Tea (Potassium for fruiting)
- Soak 4-5 banana peels in 1 litre of water for 48 hours
- Dilute 1:5 with water
- Use every 15 days for tomatoes, chillies
Cow Dung Slurry
- 1 kg of cow dung in 10 litres of water
- Ferment for 7 days (stir daily)
- Dilute 1:10
- All-purpose fertiliser, use monthly
Eggshell Powder (Calcium)
- Dry eggshells, grind to powder
- Sprinkle around tomato/chilli plants
- Prevents blossom end rot
Store-Bought Organic Options
- Vermicompost: Monthly application (1 cup per plant)
- Bone meal: At planting time for fruiting vegetables
- Neem cake: Fertiliser + pest repellent combo
- Seaweed extract: Liquid fertiliser (follow label)
Fertilisation schedule for vegetable gardens at home:
- Week 1-4: Nothing (seedling stage)
- Week 5+: Start half-strength liquid fertiliser every 15 days
- Flowering stage: Weekly feeding
- Reduce to monthly once fruits set
Seasonal Planting Calendar for India
This calendar is gold. Bookmark it.
Summer (March-June)
What thrives in hot conditions:
- Amaranth (chaulai) – ready in 30 days
- Bottle gourd (lauki) – needs trellis
- Ridge gourd (tori)
- Snake gourd
- Okra (bhindi)
- Cowpeas
- Cluster beans
- Pumpkin
Planting time: Late February for early summer harvest
Summer survival tip for home kitchen gardens: Mulch thickness = 3 inches minimum. This reduces soil temperature by 5-7°C.
Monsoon (July-September)
Monsoon champions:
- Spinach (palak) – continuous harvest
- Coriander (dhaniya)
- Fenugreek (methi)
- Cucumber
- Beans (all types)
- Gourds (thrive in humidity)
- Leafy greens (amaranth, fenugreek)
Critical: Fungal disease prevention
- Neem spray every 7 days
- Ensure drainage
- Don’t water unless top topsoil is dry
Winter (October-February)
Peak season for kitchen gardening at home in India!
October planting:
- Tomatoes
- Brinjal
- Cauliflower
- Cabbage
- Peas
- Beans
November planting:
- Carrot (requires loose soil)
- Beetroot
- Radish
- Turnip
- Coriander
- Spinach
- Mustard greens
December planting:
- Lettuce (grows fast)
- Celery
- More coriander (continuous sowing!)
Why winter is special: Cool temperatures = slower pest reproduction. Your home kitchen garden faces fewer challenges.
Succession Planting: Never Run Out of Harvest
Most beginners make this mistake: They plant everything at once, harvest everything at once, then wait months for the next batch.
Here’s the smarter way:
The Continuous Harvest System
For fast-growing crops (coriander, spinach, radish):
- Divide your space into 4 sections
- Plant Section 1 today
- Plant Section 2 after 10 days
- Plant Section 3 after 20 days
- Plant Section 4 after 30 days
By day 40, Section 1 is ready to harvest. By day 50, Section 2 is ready. And you’ve already replanted Section 1. Infinite loop activated.
Intercropping Magic for Vegetable Gardens at Home
Plant fast-maturing crops between slow-maturing ones:
Example setup:
- Main crop: Tomato plants (70-day harvest)
- Between tomatoes: Radish (30 days)
- After radish harvest: Spinach (40 days)
- Tomatoes are ready by the time spinach finishes
Space optimisation:
- Tall crops (tomatoes) on the north side
- Medium crops (chillies, brinjal) in the middle
- Short crops (coriander, spinach) on the south side
No plant shades another. Maximum productivity from your kitchen garden at home.
Space-Hacking Techniques: Grow More in Less
If you have limited space, think vertical.
Vertical Garden Structures
1. Pallet Gardens
- Source: Free from shops/warehouses
- Stand vertically, attach grow bags/pots
- Ideal for herbs, strawberries
- Weight capacity: 30-40 kg
2. PVC Pipe Towers
- Cut 4-inch holes in a 6-inch diameter PVC pipe
- Fill with soil, plant in holes
- Great for strawberries, herbs
- Height: 4-6 feet
3. Trellis & Netting
- Essential for bottle gourd, beans, peas, and cucumbers
- Use bamboo sticks in an A-frame or teepee structure
- Or nylon trellis netting (₹50-100)
4. Stacked Planter Systems
- 3-4 pots stacked with descending sizes
- Top: Herbs
- Middle: Leafy greens
- Bottom: Trailing plants like mint
5. Hanging Baskets
- Perfect for cherry tomatoes, strawberries
- Use coconut coir liners
- Ensure adequate drainage
The Intensive Square Foot Method
Instead of rows, divide your garden bed into 1×1 foot squares:
Per square foot planting:
- 16 radishes OR
- 16 carrots OR
- 9 spinach plants OR
- 4 lettuce OR
- 1 tomato/brinjal OR
- 1 chilli plant
This method increases yield by 80% compared to traditional row planting in home kitchen gardens.
Seed Selection & Saving: Build Your Seed Library
Most gardeners buy seeds every season. Here’s how to break that cycle:
Hybrid (F1) vs Open-Pollinated vs Heirloom
Hybrid F1 Seeds:
- Pros: Vigorous growth, disease resistant, uniform
- Cons: Seeds from harvest won’t grow true to type
- Verdict: Buy for challenging crops (tomatoes in summer)
Open-Pollinated:
- Pros: Seeds produce identical plants, adapt to your local conditions over generations
- Cons: May be less uniform
- Verdict: Best for your home kitchen garden seed library
Heirloom:
- Open-pollinated varieties, 50+ years old
- Rich flavours, biodiversity
- My recommendation for serious gardeners
How to Save Seeds from Your Vegetable Garden at Home
Tomatoes:
- Choose the best fruit from the healthiest plant
- Scoop out seeds + gel
- Ferment in water for 3 days (removes germination inhibitors)
- Rinse, dry on paper for 5-7 days
- Store in a paper envelope in a cool, dark place
Chillies:
- Let fruit ripen completely on the plant (turns red)
- Dry for 10 days
- Extract seeds
- Store in a paper envelope
Coriander/Fenugreek:
- Let the plant bolt and flower
- Allow seed heads to dry on the plant
- Collect when brown and dry
- Store in an airtight container
Seed viability:
- Tomato/chilli: 4-5 years
- Coriander/fenugreek: 2-3 years
- Beans: 3-4 years
- Cucumber: 5-6 years
Storage tip: Add a silica gel packet to the seed container. Maintains low humidity, extends viability.
Where to Buy Quality Seeds in India
- Online: Seedsnpots, AllThatGrows, Ugaoo, Amazon (check seller ratings)
- Local: Your neighbourhood nursery (support local)
- Government: IARI, State agriculture departments (heirloom varieties)
- Seed exchanges: Join local gardening groups on Facebook (free seeds + community!)
Troubleshooting: Visual Diagnostic Guide
Yellow Leaves (Most Common Problem)
If lower leaves turn yellow:
- Cause: Nitrogen deficiency
- Solution: Apply cow dung slurry or vermicompost tea
If all leaves turn pale yellow:
- Cause: Overwatering (root suffocation)
- Solution: Reduce watering, ensure drainage, and let the soil dry
If leaves are yellow with green veins:
- Cause: Iron deficiency
- Solution: Spray ferrous sulfate solution (1g per litre)
Brown Leaf Tips
- Cause: Salt accumulation from over-fertilisation
- Solution: Flush soil with plain water, reduce fertiliser
Holes in Leaves
- Cause: Caterpillars, snails, grasshoppers
- Solution: Manual removal early morning, neem spray
White Powder on Leaves
- Cause: Powdery mildew (fungal)
- Solution: Buttermilk spray, improve air circulation, reduce humidity
Wilting Despite Moist Soil
- Cause: Root rot or severe pest damage
- Solution: Check roots. If brown/mushy = root rot. Start fresh with new soil.
Stunted Growth
Possible causes:
- Pot too small → transplant to a larger container
- Nutrient deficiency → add compost
- Insufficient sunlight → relocate
- Root-bound → visible roots circling at drainage holes? Time to transplant.
Flowers Dropping Without Fruit
- Cause: Pollination failure (common in balcony gardens)
- Solution: Hand pollinate with a cotton swab, plant flowers nearby to attract pollinators
Blossom End Rot (Black bottom on tomatoes)
- Cause: Calcium deficiency + irregular watering
- Solution: Eggshell powder in soil, consistent watering schedule
Water Conservation: Critical for Indian Summers
Rainwater Harvesting for Kitchen Gardens at Home
Simple setup:
- Divert roof runoff into storage drums/tanks
- Filter through cloth to remove debris
- Use for watering (best quality water = no chlorine!)
Calculation: 1mm of rain on a 100 sq ft roof = 60 litres of water. Monsoon months = 1,000+ litres collected
Greywater Usage (With Caution)
Safe sources:
- Kitchen sink (vegetable washing water)
- RO reject water (mix 1:1 with tap water)
- Washing machine rinse cycle (avoid if using harsh detergents)
Unsafe sources:
- Dishwashing water (oil + chemicals)
- Toilet/bathroom water
- Water used for meat/fish cleaning
Moisture Retention Strategies
- Mulching (Most effective): 3-inch layer = 70% reduction in water evaporation
- Drought-resistant varieties: Amaranth, cowpeas, cluster beans
- Terracotta ollas: Buried pots for slow-release watering
- Drip irrigation: 90% water efficiency vs 50% for overhead watering
Deep Watering Technique
Instead of frequent shallow watering (roots stay near the surface), water deeply but less often. This forces roots to grow deep = stronger, drought-resistant plants.
Method: Water until you see drainage from the bottom. Wait until the top 2 inches are dry before next watering. Your home kitchen garden will develop robust root systems.
Building Community Around Your Kitchen Garden at Home
Start a Seed Library
Swap seeds with neighbours, share excess seedlings. What grows well in your balcony will likely thrive in your neighbour’s similar conditions.
Document Your Journey
Take weekly photos. You’ll be amazed at how much you forget. Plus, your data helps identify patterns:
- Which varieties performed best?
- When did pests attack?
- What was the weather like during failures?
Join Local Gardening Groups
Search “kitchen gardening [your city]” on Facebook. These groups are goldmines:
- Free seeds/saplings
- Local pest solutions
- Variety recommendations
- Emotional support when your tomatoes die
Teach Kids (The Future Gardeners)
- Age 3-5: Watering duty, planting large seeds (beans, pumpkin)
- Age 6-9: Full planting process, harvest tracking, pest identification
- Age 10+: Garden planning, record keeping, cooking with harvest
Children who grow food eat 2-3x more vegetables. Science backs this.
The Ugly Truth: What Will Go Wrong
Let’s get real. Your first season will have casualties.
You will:
- Overwater and kill plants
- Underwater and kill plants (yes, both will happen)
- Battle pests you’ve never seen before
- Watch caterpillars devour your prized tomato plant overnight
- Get discouraged when neighbours’ gardens look better
This is normal. Every expert gardener has killed hundreds of plants. The difference? They kept going.
The Rescue Protocol for Struggling Kitchen Gardens
Week 1-2 and nothing sprouting?
- Seeds might be dead. Test: Place 10 seeds on a wet tissue. If <5 germinate in 5 days = bad seeds.
Plants growing but pale/weak?
- More sunlight + fertilisation needed
Pests winning despite your efforts?
- Sometimes, you have to accept defeat on one plant to save others. Remove heavily infested plants completely.
Thinking of quitting?
- Take a 1-week break. Don’t quit permanently. Your garden will still be there.
The Philosophy of Home Kitchen Gardens: Beyond Food
Here’s what nobody tells you about kitchen gardening at home:
It teaches patience in an instant gratification world. You can’t rush a tomato.
It teaches acceptance. Sometimes plants die despite your best efforts. Weather happens. Pests happen. Life happens.
It teaches observation. You’ll notice the tiniest leaf change, the first flower bud, and a ladybug (your new best friend). You become present.
It teaches humility. A tiny seed contains intelligence you cannot comprehend. You’re just facilitating, not controlling.
And most importantly, it reconnects you to cycles we’ve forgotten—seasons, moon phases, the rhythm of growth and rest.
Your vegetable garden at home becomes a meditation practice, a stress reliever, a nature classroom, and a food source all at once.
Your Year One Roadmap: Month-by-Month Plan
Let me give you an exact action plan for starting your kitchen garden at home:
Month 1 (Setup Phase)
- Week 1: Buy containers, soil, seeds
- Week 2: Fill containers, plant first herbs (coriander, mint)
- Week 3: Plant fast-growing vegetables (spinach, radish)
- Week 4: Set up composting system
Month 2 (Learning Phase)
- Establish a watering routine
- Start seed-saving from store-bought vegetables
- Join a local gardening group
- First harvest: Microgreens, radish
Month 3 (Expansion Phase)
- Plant seasonal vegetables
- Try one new technique (vertical growing or succession planting)
- First compost ready!
- Harvest: Coriander, spinach
Months 4-6 (Confidence Building)
- Experiment with challenging crops (tomatoes)
- Refine pest control methods
- Start selling/giving away excess produce
- Harvest: Herbs continuously, first tomatoes
Months 7-12 (Mastery Phase)
- Plan next season based on learnings
- Try advanced techniques (grafting, hydroponics)
- Teach someone else to start their garden
- Consistent harvests across seasons
The Hidden Benefits Nobody Talks About
Beyond fresh food and lower grocery bills, your home kitchen garden will:
- Improve air quality: One tomato plant produces enough oxygen for 1 person for 1 day
- Reduce food waste: You pick only what you need
- Build practical skills: Problem-solving, patience, observation
- Create conversation starters: Neighbours will ask questions
- Provide therapy: Lower blood pressure, reduced anxiety
- Teach economics: ROI, investment, delayed gratification.
- Connect generations: Grandparents LOVE talking about gardening
When to Scale Up (or Down)
Signs You’re Ready for More
- Your current plants are thriving
- You’re consistently harvesting
- You’ve solved 2-3 problems independently
- You’re craving variety
- You have more space/containers
Signs You Should Simplify
- Garden feels like a chore
- Too many plants are dying
- Can’t keep up with maintenance
- Harvest going to waste
- Feeling overwhelmed
There’s no shame in scaling down. Three thriving pots of herbs beat twenty dying vegetable plants. Quality over quantity, always.
The Kitchen Garden at Home Maintenance Schedule
Daily (5-10 minutes)
- Check soil moisture (finger test)
- Look for pest damage
- Harvest-ready produce
- Remove dead leaves
Weekly (30 minutes)
- Fertilise (if needed)
- Deep watering session
- Pest spray (neem oil)
- Weed removal
- Turn compost
Monthly (1-2 hours)
- Plant new seeds (succession planting)
- Major cleanup
- Tool maintenance
- Transplant overgrown plants
- Review what’s working/not working
Seasonal (Half day)
- Complete garden overhaul
- Soil replenishment
- Container cleaning
- Seed sorting
- Garden plan for next season
Your Shopping List to Start Today
Essentials (₹1,500-2,000)
- 5-6 containers/grow bags (various sizes)
- 30L soil mix (ready-made or DIY ingredients)
- Seed packets (5-6 varieties): ₹300
- Neem oil: ₹150
- Hand trowel: ₹100
- Watering can: ₹150
Nice-to-Have (₹1,000-1,500)
- Compost bin: ₹500
- Garden scissors: ₹200
- Vermicompost: ₹150
- Shade net: ₹300
- Gardening gloves: ₹100
Eventually
- Drip irrigation system: ₹1,500-3,000
- Grow lights for indoor: ₹1,000-2,000
- More fancy containers
- Advanced tools
So, are you in the mood to grow organic vegetables at home
Final Words: The Garden Within
I started my kitchen garden at home four years ago with six pots on a balcony in Bangalore. Three pots died in the first month. The coriander looked pathetic. The tomatoes attracted whiteflies like a convention centre.
Today, I grow 30+ varieties across my terrace. I haven’t bought coriander in three years. My electricity bill is lower (terrace temperature dropped by 3°C). My six-year-old knows where food comes from.
But the biggest change? I’m calmer. More patient. More connected.
Your vegetable garden at home won’t just feed your body. It’ll feed something deeper—a part of you that’s been dormant under concrete and screens. That part that knows how to wait, how to nurture, how to trust.
Start small. Start today. One pot of coriander is a revolution.
The seeds are waiting. Your soil is calling. And your first harvest—that triumphant moment when you bite into something you grew with your own hands—that moment is closer than you think.
Welcome to the kitchen gardening at home community. Your journey starts now.
Have questions? Share your home kitchen garden journey in the comments below. What are you planting first? What are your biggest concerns? Let’s grow together.
Remember: Every expert gardener was once a beginner who refused to quit. You’ve got this.